
The most popular advice about DIY home eyelash extensions is also the advice I'd challenge first: “They're easy, so just follow the kit instructions.” Ease of placement isn't the same as safety. You're working beside the cornea with adhesive, sharp tools, and lashes that can pull on living follicles. If you're in Bankstown, Revesby, Parramatta, or anywhere else in Australia, the sensible question isn't only whether you can create a pretty set at home. It's whether your setup, product, hygiene, eyesight, and removal plan can manage the risks a salon controls every day.
What DIY Home Eyelash Extensions Really Mean in Australia
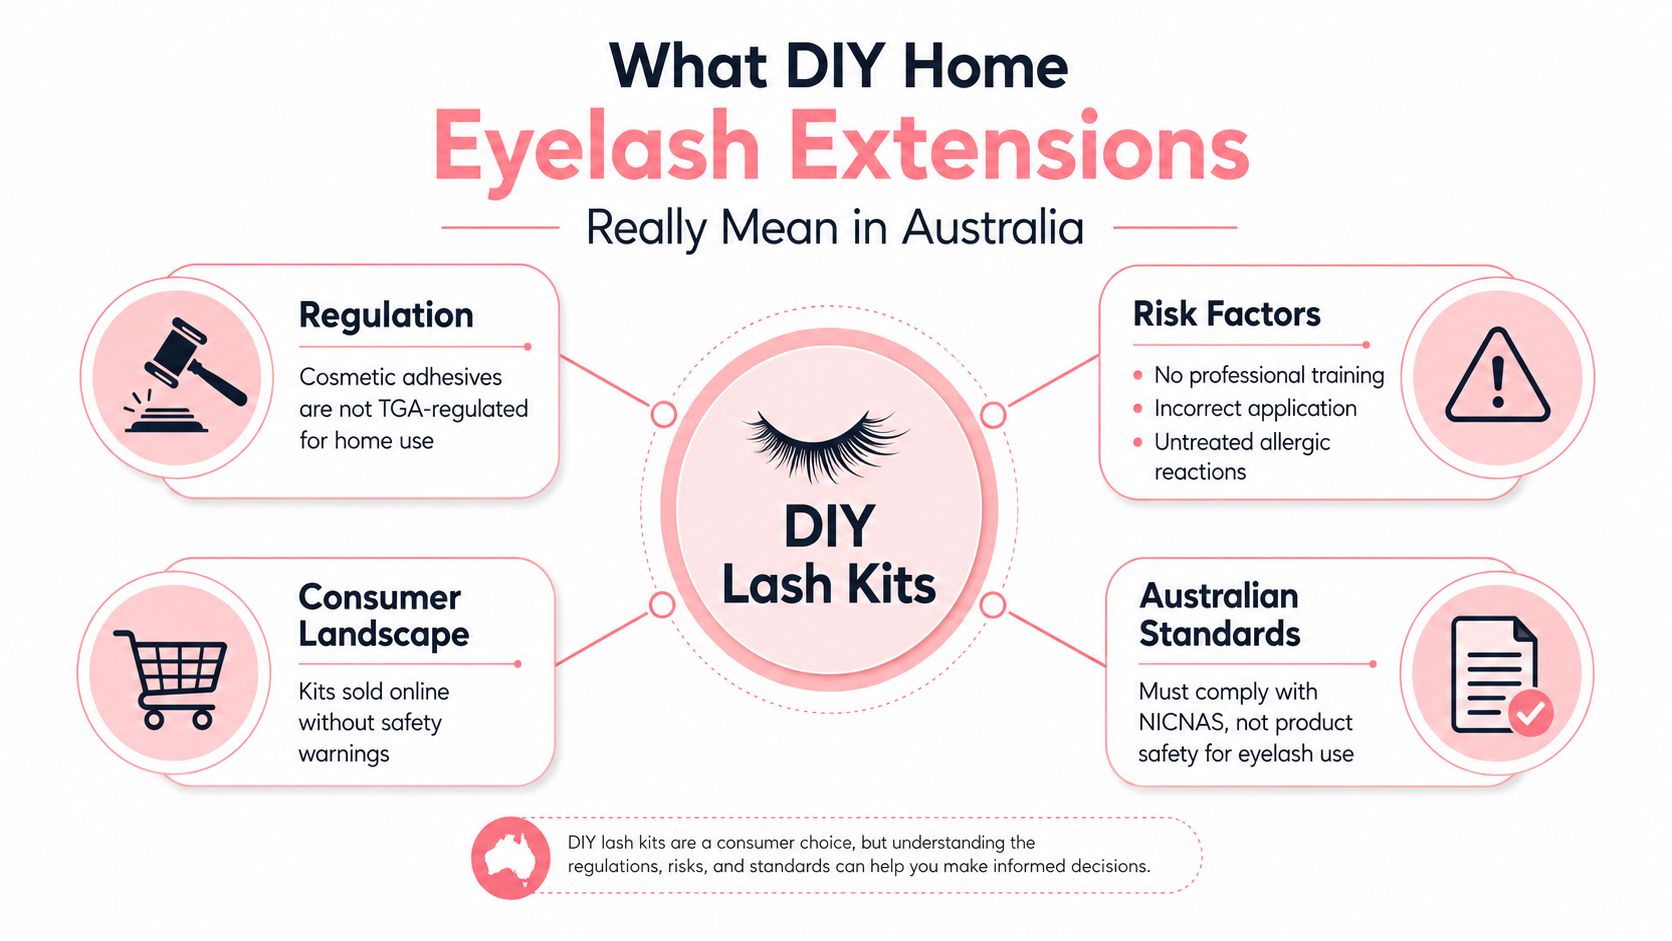
DIY lashes look like a small beauty purchase, but the Australian context makes them a bigger consumer decision. CHOICE's reporting on eyelash extensions found in 2014 that Australia had no formal training requirements specifically for applying eyelash extensions. That meant someone could theoretically offer the service as a business or side service while still needing to follow local, state or territory, and federal work health and safety rules.
That gap helped make lash application appear accessible. It also meant risk management could shift to the person holding the tweezers. At home, you're responsible for screening ingredients, controlling airflow, preventing tool contamination, protecting the eye, and removing the product without force.
Regulation doesn't equal safety
NSW Health's beauty-treatment framework treats some cosmetic procedures as skin-penetration procedures and requires infection-control compliance under the Public Health Regulation 2022. Guidance associated with NSW beauty-treatment requirements includes keeping the business clean, cleaning treatment benches between clients or using a clean covering, and opening sterile packaging immediately before treatment. Those controls are designed for organised treatment environments. A bathroom vanity with reused tweezers and an open glue bottle doesn't automatically provide the same protection.
Imported kits create another problem. Products bought through overseas marketplaces may have unclear ingredient disclosure, missing batch information, or instructions that don't explain eye-specific hazards. A polished package tells you very little about whether the adhesive is appropriate for use near the lash line.
Practical rule: Treat every DIY kit as a chemical product used near the eye, not as a harmless accessory.
CHOICE specifically warned that adhesive leakage or remover exposure can cause keratoconjunctivitis, while glue or tape allergies can trigger allergic blepharitis. That makes DIY application a category of behaviour with legal, chemical, hygiene, and ocular responsibilities. If you can't identify the adhesive, ventilate the room, clean the tools, and remove the set safely, don't open the bottle.
The Main DIY Formats and How Each One Works
Not every at-home lash product is an extension in the salon sense. The attachment point, adhesive strength, and removal process change the risk profile.
Cluster or flare lashes use small bundles of fibres. You place several bundles beside one another to create a softer, customised effect. They're closer to a simplified hybrid appearance than to classic extensions because one bundle can contact multiple natural lashes. That saves placement time, but it makes isolation harder. If neighbouring lashes stick together, they can tug against one another as they grow and shed.
Pre-bonded strip lashes use a flexible band and temporary adhesive. They're generally designed for short wear, often for a single occasion, and they sit along the eyelid rather than being individually attached to each natural lash. The band is easier to understand, but the inner and outer corners can lift, and a loose edge can catch on clothing, bedding, or fingers.
Underlash systems attach a curved strip beneath the natural lashes. This creates a natural appearance because the band is hidden from above. It also brings the adhesive closer to the underside of the lash line and can make removal more complicated. The product may look lighter and more natural, but it still uses an adhesive close to the eye.
| Format | Application method | Typical wear | Skill required |
|---|---|---|---|
| Cluster or flare | Small fibre bundles placed beside or under natural lashes | Several days, depending on product and care | Moderate |
| Pre-bonded strip | Flexible band attached along the eyelid | Short-term, often occasion wear | Beginner to moderate |
| Underlash | Curved segments attached beneath natural lashes | Short-term to several days, product dependent | Moderate |
| Individual fibre | One extension attached to one natural lash | Professional-style placement | High |
The comparison of at-home lash lift kits is useful if you're considering a lift instead of adding fibres. A lash lift changes the curl of your existing lashes, so it avoids the repeated fibre placement problem, but it still involves chemical processing near the eye and deserves careful product selection.
The key distinction is where the glue sits and how many natural lashes it joins. A band is simpler to position. Clusters offer more customisation. Underlash designs can look more natural. None removes the need for clean tools, careful ingredient screening, controlled application, or a gentle removal plan.
Adhesive Chemistry, Formaldehyde and Home Ventilation
Most semi-permanent lash adhesives rely on cyanoacrylate, a fast-bonding adhesive family that cures when exposed to moisture. That curing process creates the firm attachment needed for extensions, but it also means the product isn't just sitting harmlessly on the lashes. During and after application, vapours and residue can irritate sensitive eyes, skin, and airways.
Peer-reviewed evidence recorded in the PubMed study on formaldehyde release from eyelash glues shows that some eyelash glues may release formaldehyde even when formaldehyde isn't listed as an ingredient. A “formaldehyde-free” label therefore shouldn't be treated as a complete guarantee that no exposure is possible.
Why the room matters
A small bathroom in Bankstown, Revesby, or an apartment in Parramatta can trap fumes around your face. A closed door, warm shower air, and weak extraction create a poor environment for close-range adhesive work. A salon technician can control the room, product placement, client position, and airflow. A home user often works with one eye closed, one hand holding an applicator, and the other trying to keep the eyelid still.
Use the smallest practical amount of adhesive, keep the bottle closed between placements, and create genuine cross-ventilation rather than relying on a decorative fan. Don't work through burning, watering, blurred vision, or persistent irritation. Move away from the area and seek medical advice if symptoms continue or become severe.
Safety data sheets also illustrate why chemical identification matters. A resource explaining the structure of a 16-section SDS for bleach shows how a proper safety document records hazards, handling, storage, exposure controls, and emergency measures. Lash adhesive packaging rarely gives a DIY user that same level of practical clarity, so reading the ingredients and manufacturer warnings matters before use.
For eye-specific warning signs and the difference between irritation and a chemical injury, review guidance on lash-extension chemical burns and reactions. If glue enters the eye, don't try to force the lids apart. Get urgent professional medical assistance.
DIY Sets Versus Classic Hybrid and Volume Extensions
A DIY set wins on immediate convenience, not necessarily on total value. A cluster kit can be inexpensive to start, but its result depends on your isolation, placement, adhesive control, and removal. A strip set takes less technical skill, yet the band limits the shape and density you can create. Underlash products can look more integrated, but their stronger bond brings the adhesive closer to the eye.
Salon extensions use a different operating model. Classic extensions attach one synthetic fibre to one natural lash. Hybrid extensions combine classic singles with handmade volume fans for texture. Volume extensions place multiple ultra-fine fibres into a fan, producing a denser finish. These methods require a trained technician, controlled isolation, and a client who can remain still throughout the appointment.
The relevant comparison is not “cheap versus expensive”. It's time investment versus result, maintenance, and exposure.
| Format | Session time | Longevity | Cost per wear (AUD) | Injury risk |
|---|---|---|---|---|
| DIY cluster | Variable | Short-term, product dependent | Varies by kit and reuse | Depends heavily on isolation, glue control, and removal |
| DIY strip | Usually brief | Short-term | Varies by pack and use | Band lifting, glue or tape reaction |
| DIY underlash | Variable | Short-term to several days | Varies by kit | Adhesive sits close to the lash line |
| Classic salon set | Appointment length varies | Several weeks, with maintenance | Studio dependent | Managed by trained application and hygiene |
| Hybrid salon set | Appointment length varies | Several weeks, with maintenance | Studio dependent | Managed by trained application and hygiene |
| Volume salon set | Appointment length varies | Several weeks, with maintenance | Studio dependent | Managed by trained application and hygiene |
Don't confuse a lighter style with a safer style. Recent Australian lash-market coverage describes demand for natural-looking, customised, sustainable, and cruelty-free choices, but the format doesn't remove the core hazards. Acrylate and cyanoacrylate adhesives can still irritate the eye or trigger a reaction, and poor removal can still pull on natural lashes.
Choose DIY for occasional, restrained wear only if you can maintain a disciplined workspace. Choose classic, hybrid, or volume salon work when you want a mapped eye shape, consistent separation, predictable maintenance, or help from someone who can see both eyes clearly.
Preparing a Safe Home Workspace Before You Start
A professional wouldn't begin at a cluttered dressing table. Your workspace should be organised before the adhesive is opened, with everything within reach so you aren't searching for scissors while fumes are present.
Build the environment first
Use a hard, washable surface and clean it before you arrange the tools. Strong adjustable lighting and a magnifying mirror help you see placement, while a loupe can expose stuck-together lashes that ordinary bathroom lighting hides. A fan can support cross-ventilation, but it shouldn't blow directly across wet adhesive or into the eye.
Your basic preparation list should include:
- Clean surface: Wipe the table with an appropriate disinfecting product and let it dry.
- Dedicated tools: Use clean tweezers, scissors, micro-brushes, and lint-free wipes.
- Waste control: Place used wipes and adhesive materials into a sealed bag rather than leaving them on the table.
- Eye preparation: Wash your hands, remove contact lenses, and start with clean, dry lashes.
- Lighting and airflow: Keep the room bright and ventilated before you sit down.
Patch testing has limits
A patch test may reveal a skin response, but it can't guarantee that the eye will tolerate the adhesive. The workspace plan in the supplied checklist refers to allowing a patch test to sit for 24 hours before lash-line contact. If you have a history of eczema, adhesive allergy, eye disease, or unexplained eyelid swelling, DIY application isn't a sensible experiment.
Tools also need proper decontamination. Tweezers, scissors, and reusable surfaces shouldn't be treated as clean because they look clean. Salons invest in sterilisation and disinfection systems because invisible contamination can transfer directly to the eyelid. At home, disposable tools reduce some handling risk, but they don't solve poor hand hygiene or a contaminated adhesive nozzle.
Keep safe at-home lash-extension removal guidance available before you start. If you don't already have the correct remover and enough time to use it gently, postpone the application.
Real Risks Sydney Optometrists Are Seeing
Australian optometrists have reported seeing irritation, inflammation, chemical burns, infections, and permanent lash loss associated with extensions. ABC News' reporting on optometrist observations links these outcomes to mechanisms readers can understand: adhesive or remover exposure, contaminated application, and damage around the eye.
Consider three representative scenarios. They aren't presented as named patient case studies, because personal clinical details shouldn't be invented. They reflect the failure patterns a lash technician should take seriously.
The glued-lid problem
A Bankstown client places clusters too close to the lid margin. During sleep, one slips and bonds against nearby skin. The person wakes with the eyelid sticking, pulls at it, and creates mechanical trauma while trying to separate the area.
The mistake isn't “bad luck”. It combines excess adhesive, poor distance from the skin, movement during sleep, and an unsafe removal attempt. Glue or remover must never be forced across the eye.
The reaction that starts later
A Revesby teenager skips a patch test and develops itching, redness, and swelling after cyanoacrylate exposure. An allergic reaction may not feel like a dramatic accident at first. Repeated exposure can make future reactions more concerning, so persistent swelling or itch deserves medical assessment rather than another layer of concealer.
The Australian Society of Ophthalmologists warns that extensions can cause trauma or infection to the eyelid or cornea, allergic reaction to glue, and temporary or permanent lash loss. It also connects infection with inadequate hygiene or damage during application in its eyelash-extension safety information.
The traction cycle
Repeated tension and rough removal can weaken the natural lash line. A user who keeps reapplying clusters over lashes that are already stressed may notice gaps, uneven density, or shorter-looking lashes. The Australian Academy of Ophthalmology advises using an experienced aesthetician in a sanitary setting with chemicals safe for the skin, as stated in its guidance on safe eyelash application.
Optometry clinics serving Parramatta, Roselands, and Sydney's CBD encounter eye irritation and lash-related complications as a recognisable concern, not something a user should dismiss because the set was bought online. Seek urgent care for eye pain, vision changes, marked swelling, discharge, or suspected chemical exposure.
Choosing Between DIY and a Sydney Lash Studio
Use four checkpoints before deciding: wear frequency, adhesive tolerance, workspace quality, and the budget you can sustain. Someone who wants lashes for one event and has no sensitivity history has a different decision from someone who wants dense volume continuously.
DIY can make sense for occasional wear if you're comfortable with short-term results and can maintain a clean, ventilated setup. Strip lashes are the more conservative starting point because they're temporary and don't require you to bind multiple natural lashes together. Clusters and underlash formats demand more control. If your hands shake, your vision is poor without glasses, or you can't keep one eye still, don't practise near the lash line.
A Sydney studio can be the better compromise when you want a customised shape without managing every technical variable yourself. In Yagoona, Roselands, Revesby, or North Parramatta, ask the technician direct questions before booking:
- Adhesive transparency: Will they identify the adhesive brand and explain its intended use?
- Patch-test policy: Do they discuss sensitivity and offer a suitable patch-test process?
- Hygiene controls: Are benches cleaned between clients, and are single-use items opened at the right time?
- Ventilation: How is airflow managed during application?
- Removal planning: What happens if your eyes become irritated or a set needs professional removal?
- Technician training: What qualifications, supervision, or practical experience does the technician have?
Don't make the decision from a single appointment price. Compare the result you want with the number of applications, replacements, removals, and recovery days you may need. A low upfront cost isn't low cost if the set causes damage or you abandon the kit after one stressful application.
| Format | Average cost per wear | Annual estimate, 52 wears | Typical session time | Reported complication rate |
|---|---|---|---|---|
| DIY strip | Product dependent | Product dependent | Brief, depending on placement | No reliable Australian rate provided |
| DIY cluster | Product dependent | Product dependent | Variable | No reliable Australian rate provided |
| DIY underlash | Product dependent | Product dependent | Variable | No reliable Australian rate provided |
| Sydney classic studio | Studio dependent | Studio dependent | Appointment length varies | No reliable Australian rate provided |
| Sydney hybrid studio | Studio dependent | Studio dependent | Appointment length varies | No reliable Australian rate provided |
| Sydney volume studio | Studio dependent | Studio dependent | Appointment length varies | No reliable Australian rate provided |
This is the honest decision: choose DIY only when you accept the technical responsibility and keep the look modest. Choose a trained studio when you want longevity, mapping, volume, or help managing sensitivity. Bonna Beauty provides classic, hybrid, volume, wispy, and designed eyelash extensions, along with lash lifts and tints, through Sydney locations including Yagoona, Roselands, Revesby, and North Parramatta.
If you want a professional alternative to DIY home eyelash extensions, visit Bonna Beauty to compare customised lash extensions and lash-lift services. Book a consultation, ask about adhesive and hygiene procedures, and choose a style that suits your natural lashes rather than forcing a risky home application.